Your shopping cart is empty!


DOCTOR INFORMATION
Respiratory Examination (OSCE)
Respiratory Examination (OSCE)
Introduction
- Greet the patient and introduce yourself
- Confirm patient details ✍
- Explain the procedure in a patient friendly manner
- Get patient consent ✍
- Wash hands ✋
- Set the head of the bed to a 45° angle, and expose the patient’s chest and legs
- Check the patient is not in any pain
General inspection of the patient
Identify any clinically relevant signs:
🌬 Age
🌬 Coughing: productive coughs can indicate pneumonia, bronchiectasis, COPD or CF and dry coughs can indicate asthma or interstitial lung disease
🌬 Wheezing: whistling sound which often suggests asthma, COPD, and bronchiectasis
🌬 Shortness of breath: signs include inability to speak in complete sentences, flaring of nostrils, pursed lips etc.
🌬 Stridor: when the upper airways are narrowed, air flow becomes turbulent, causing a high-pitched sound
🌬 Cachexia: ongoing muscle loss, indicates end-stage respiratory disease
🌬 Oedema: swelling of limbs when the ventricles fail
🌬 Pallor: pale skin indicative of anaemia or poor perfusion
🌬 Cyanosis: bluish skin due to poor circulation or poorly oxygenated blood
Identify any relevant objects of equipment:
🌬 Oxygen delivery devices
🌬 Prescriptions
🌬 Vital signs
🌬 Fluid balance
🌬 Sputum pot: record the colour and volume of the contents
🌬 Mobility aids ♿
🌬 Cigarettes/ vapes
🌬 Other medical equipment: ECG leads, catheters, intravenous accessories or medications
Hands
Inspection:
Observe the following characteristics:
🌬 Swelling at the joints or deformity: rheumatoid arthritis
🌬 Tar staining: smoking
🌬 Skin changes: bruising and thinning of skin due to long term steroid use
🌬 Colour: cyanosis indicative of hypoxaemia
🌬 Finger clubbing: indicative of lung cancer, interstitial lung disease, cystic fibrosis and bronchiectasis
- Ask the patient to place the nails of their index fingers back to back
- You should see a diamond shaped window
- No window is known as clubbing
🌬 Fine tremor: observe the patient’s outstretched hand to identify a fine tremor
- Associated with beta-2-agonist such as salbutamol use
- Asterixis ‘flapping tremor’: flapping hands caused by irregular posture lapses, likely caused by CO2 retention in conditions which cause type 2 respiratory failure
- Ask the patient to move their hand backwards at the wrist for 30 seconds
- Observe to see if there is any evidence of asterixis
Palpation:
Temperature of the hands: assess using the back of your hand
🌬 Symmetrical warmth: in healthy individuals
🌬 Cold hands: indicates poor peripheral perfusion ❄
🌬 Warm hands: suggests CO2 retention
Heart rate: assess by measuring the rate for 60 seconds, and the rhythm of the radial pulse
🌬 Bounding pulse: CO2 retention
🌬 Pulsus paradoxus: pulse volume decrease is abnormally large when the patient inspires (late sign pf cardiac tamponade, severe COPD or severe acute asthma)
Respiratory rate: assess the respiratory rate for 60 seconds, whilst simultaneously assessing the radial pulse, noting any difference between inspiration and expiration
🌬 Healthy individuals: 12-20 breaths per min
🌬 Bradypnoea: <12 breaths per min
🌬 Tachypnoea: >20 breaths per min
Jugular venous pressure (JVP)
JVP enables you to indirectly measure the central venous pressure:
🌬 The internal jugular vein (IJV) is directly connected to the right atrium, meaning there is a continuous blood column
🌬 The IJV reflects the right atrial action (e.g. raised pressure in the right atrium is reflected by the IJV becoming distended)
🌬 It is hard to visualise the IJV but the most reliable indirect measurement
Measuring the JVP:
- Turn the patient’s head slightly left
- Assess the IJV (visible as a double waveform pulsation, just above the clavicle, between the sternal and clavicular heads of the sternocleidomastoid muscle at the root of the neck)
- Measure 📏 the distance between the top of the IJV pulse and the sternal angle, this gives you the JVP
- Healthy individuals: <3cm
- Raised JVP: venous hypertension
🌬 Hepatojugular reflux test: apply pressure to the liver whilst simultaneously observing for a lasting rise in the JVP
Face
Inspect the face:
🌬 Plethoric complexion: red skin can indicate polycythaemia and CO2 retention
Inspect the eyes 👁:
🌬 Ptosis, miosis and enophthalmos: Horner’s syndrome
🌬 Conjunctival pallor: anaemia
Inspect the mouth 👄:
🌬 Oral candidiasis: fungal infection caused by steroid inhaler use (mouth red with white patches)
🌬 Central cyanosis: bluish lips/ tongue caused by hypoxaemia
Inspect the chest
Scars:
🌬 Infraclavicular scar: pacemaker insertion
🌬 Axillary thoracotomy scar: chest drain insertion
🌬 Skin changes associated with radiotherapy: xerosis, scale, hyperkeratosis, telangiectasia and hyperkeratosis
🌬 Median sternotomy scar: cardiac valve replacement and coronary artery bypass
🌬 Posterolateral thoracotomy scar: lobectomy, oesophageal surgery or pneumonectomy
Deformities:
🌬 Hyperexpansion
🌬 Pectus excavatum: ‘caved’ appearance
🌬 Pectus carinatum: protruding sternum/ ribs
🌬 Asymmetry
Tracheal position and cricosternal distance
Assess the position of the trachea:
- Ask the patient to put their chin down to relax the neck muscles
- Use your index fingers to assess the 2 tracheal borders
- Identify a tracheal deviation if present
🌬 Can be caused when the trachea deviates away from large pleural effusions and tension pneumothorax or towards pneumonectomy and lobar collapse
Measure cricosternal distance:
🌬 Using your fingers measure the distance between the cricoid cartilage and the suprasternal notch
Healthy individuals: 3-4cm
< 3 fingers: can indicate lung hyperinflation e.g. asthma or COPD
Palpate the chest
Palpation of the apex beat:
Place your fingers across the chest horizontally, and palpate the apex beat
🌬 Healthy individuals: located in the 5h intercostal space in the midclavicular line
🌬 Displaced apex beat: caused by large pleural effusion, tension pneumothorax, right ventricular hypertrophy
Assess the chest expansion:
1. Place your hands below the nipples, wrap your fingers ✋ around the sides of the chest so your thumbs meet in the middle
2. Assess how your thumbs move
🌬 Healthy individuals: thumbs will move symmetrically up and out
🌬 Unsymmetrical movement: the thumb that moves less suggests chest expansion is reduced on that side
🌬 Symmetrical reduced chest expansion: lung elasticity is reduced by pulmonary fibrosis
🌬 Asymmetrical reduced chest expansion: caused by pneumonia/ pleural effusion/ pneumothorax
Chest percussion
Listen to volume and pitch of chest percussion:
- With your non-dominant hand ✋ on the chest wall, press your middle finger where you are percussing
- With the middle finger of your dominant hand ✋ quickly strike the middle of the finger pressing on the chest
Where to percuss?
🌬 Axilla
🌬 Chest wall
🌬 Supraclavicular region
🌬 Infraclavicular region
What will it sound 👂 like?
🌬 Stony dullness: pleural effusion
🌬 Dullness: increased tissue density
🌬 Hyper-resonance: decreased tissue density
🌬 Resonant: normal
Tactile vocal fremitus:
Palpate the chest wall in a range of locations as the patient repeats a word e.g. “99”
🌬 Increased vibration: increased tissue density
🌬 Decreased vibration: fluid or air outside lung
🌬 Vocal ? resonance: alternative method to assess sound, using a stethoscope
Auscultate the chest
- Ask the patient to breathe in and out through the mouth
- Use the diaphragm of your stethoscope to listen to the patients breathing
- Assess quality, volume, and any additional sounds you observe
- Assess different areas of the chest on both sides to compare them
Breath sounds 👂:
🌬 Vesicular: normal sounds in healthy individuals
🌬 Bronchial: harsh sounding, associated with consolidation
🌬 Quiet: entry of air into lungs restricted
Additional sounds 👂:
🌬 Stridor
🌬 Wheezing
🌬 Fine end inspiratory crackles
🌬 Coarse crackles
Assess vocal resonance:
Auscultate the chest wall in a range of locations as the patient repeats a word e.g. “99”
🌬 Increased volume: increased tissue density
🌬 Decreased volume: fluid or air outside of the lung
Tactile fremitus: alternative method, feeling for vibrations when the patient speaks with your hands
Lymph nodes
Palpation ? of the lymph nodes:
- Examine the patient from behind as they sit upright
- Assess for neck irregularity or lymphadenopathy
- Palpate the neck from behind
Use your fingers to assess the lymph node characteristics (size, consistency and mobility), assessing all areas:
🌬 Pre-auricular: located just in front of the ear👂
🌬 Post-auricular: located just beneath the ear👂
🌬 Superficial cervical: located close to the surface of the neck
🌬 Deep cervical: located near to the IJV
🌬 Submental: located along the external jugular vein
🌬 Supraclavicular: located on both sides, above the clavicle, close to the sternoclavicular joint
🌬 Submandibular: located beneath the mandible
Lymphadenopathy: caused by tuberculosis/ lung cancer/ sarcoidosis
Assess the back of the chest
🌬 Ask the patient to sit forward and fold their arms across their chest
🌬 Assess the posterior aspect of the chest following the same steps as you did for the front
Final assessments
🌬 Assess for sacral and pedal oedema as can be indicative of congestive heart failure
🌬 Assess the calves to identify deep vein thrombosis presence
🌬 Assess for erythema nodosum which can indicate sarcoidosis
Completion of the examination
- Thank the patient and inform them the examination is complete ✅
- Wash hands ✋
- Summarise what the examination has revealed ✍

Related Articles
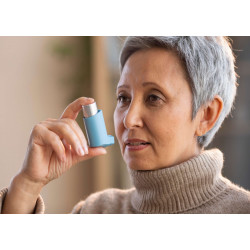
This step by step guide is designed to help you to effectively explain and describe the technique for using an inhaler in OSCEs.
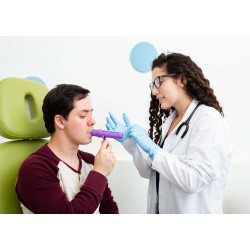
This step by step guide takes you through measuring the peak expiratory flow rate (PeFR) in OSCEs.